Forms Image Attachment to SharePoint Image Columns

In this blog we guide you through how to make use of the SharePoint Image column when automating data from a Microsoft Form or any other data integration using Power Automate.
You maybe thinking why not just use the attachment feature you may want to do this for many reasons:
- Quick preview of images – Show the image thumbnail inside the list view or gallery view of the list
- Easier for users to navigate and understand the content – one click to enlarge the image, against two clicks to view the attachments
- More tailored solution for handling and presenting images makes the list look more interactive
- SharePoint is optimised for handling specific data types, and using dedicated columns for images can lead to more efficient storage and retrieval.
The below image demonstrates the difference between using the attachments method and the image column method in a SharePoint list, the attachment doesn’t show the name of the image or the image only the paper clip to indicate that a file has been attached to the list item, the image column displays a thumbnail of the image when clicked this will enlarge, providing a much better user experience, and less clicks needed for the user to be able to see the attached content.
List View with Image Column

List View Without Image Column Using Attachment’s only

List Gallary View with Image Column

Adding documents, images and the files to a SharePoint list entry through Power Automate is fairly straight forward, you can just use the file upload question in Forms, then in Flow get the file content through the Parse JSON Action then use the ID from that output to get the file content using the ‘Get File Content from ID’ then add that file content to SharePoint using the Add Attachment action.
List Without Image Column Using Attachment’s only
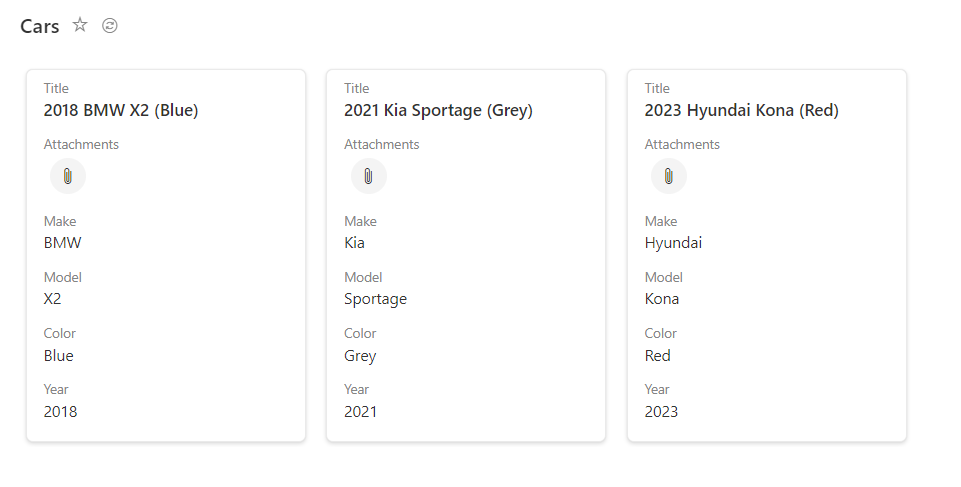
From an automation view point It becomes challenging when the form has an image which you really want to sit inside a SharePoint Image column so that it shows in the SharePoint List view or SharePoint Gallery view as an image instead of a paper clip, instead of the attachment facility, you may want to do this for many reasons one reason could be to show the image thumbnail inside the list view or gallery view of the list
We walk you through how to get images out of Microsoft forms and into the image column in SharePoint, after researching this topic for a fair while and not really finding too much help online we thought it might be useful to share how we tackled this problem
Screenshots of our full flow
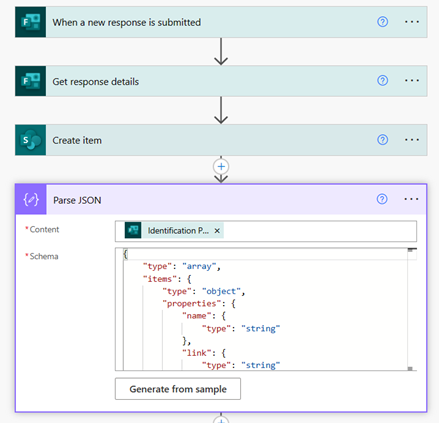
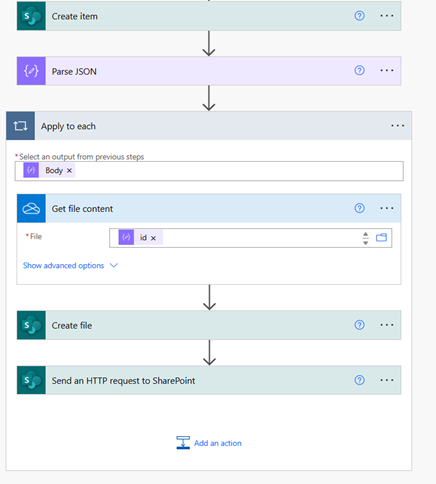
Parse JSON template code
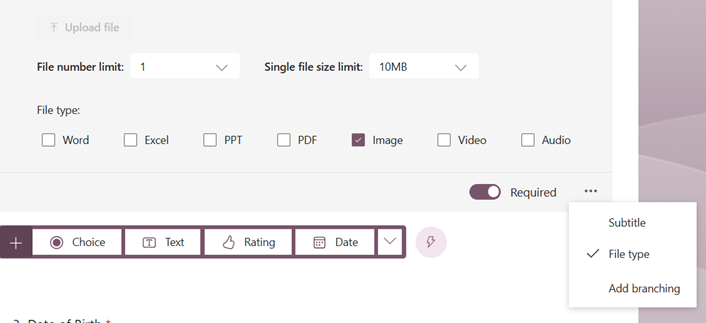
Get details from form the form needs to include a file upload question and also this needs to be set to image formats only otherwise the flow will fail.
Create Item – Create the SharePoint Item, with the relevant details.
Parse JSON from the file uploaded to the form, this still allows us to get the file ID and other document properties, so that we are able to then create the file.
In the SharePoint List get the list folder by creating a new list item and ensure you add a picture when adding the new item.
Next go to site contents then to site assets and you will see a folder with a long string of text and numbers open this folder you should see the image you just added, go back a folder level click the details of the folder and copy that long list ID for use in the create file step.
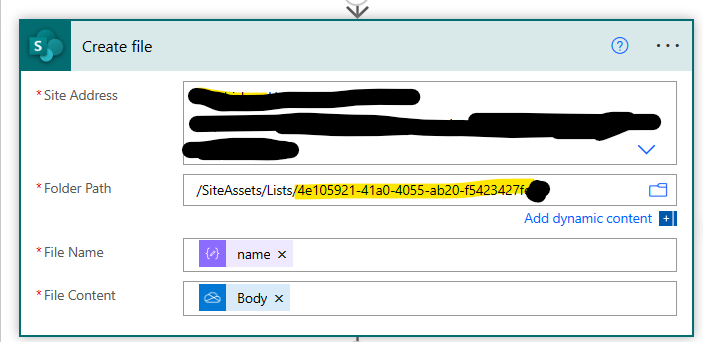
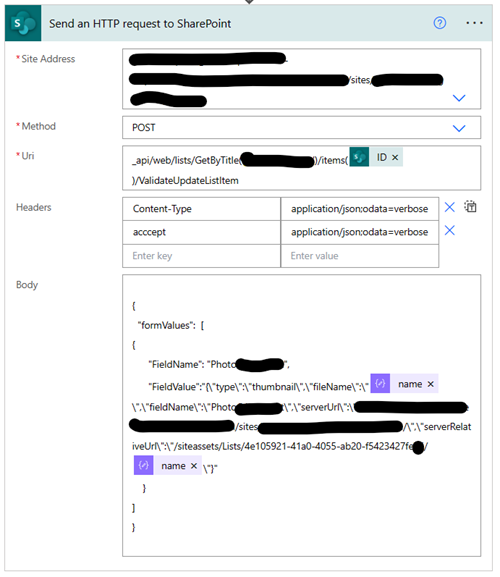
The most challenging aspect of this workflow is the custom HTTP action which essentially links the image file to the list attachments repository which in turn allows for the association to the image column, we need to configure the ‘Send an HTTP request to SharePoint’ action, use the button to download the text file containing all the code requirements to configure this action.
Uri -needs to include all of what you see on the left for the GetByTitle(‘List Name’)/Items(Id of the sharepoint item created)
serverUrl – Should be the URL for your SharePoint Site where the list is located.
serverRelativeUrl – Should be the directory you added the document to earlier it will need to be formatted similar to the image on the left ‘/siteassets/Lists/ListID’
The name elements come form the outputs from the parse JSON action.
Additional Notes
- In this example we have the form file upload field set as mandatory, so we don’t need to check if a file exists or not, if the file upload is not mandatory you would want to add a true or false type condition before the main body of logic, basically use a condition and have the condition set so that if the upload question begins with ‘[‘ then do the rest if it does not do nothing.
- Image type columns support the following image formats: JPEG, PNG, GIF, BMP, and TIFF, more formats may get added but to be on the safe side try to use the above file formats.
- Within Microsoft forms it is advisable to set the file types to only allow images to be uploaded, to avoid the flow failing if someone uploads a file which is the incorrect format. (example shown below)
Conclusion
Depending on the needs of the workflow or application, using the standard attachments method may work fine but for those solutions that require uses to administer data in a list view working with images in an image column could be a better solution, with this you can still use the attachment’s function for other related documents or additional images.
Always refer to the official documentation and guides for the most accurate and up-to-date information.
We hope you found this blog useful if you have any questions regarding the content of this blog please reply to us on Linked In.
If you want to learn more about SharePoint Lists we have wrote a blog covering just that you can read here.
Need SharePoint Help?
Would you like training on SharePoint for your teams? or do you need help setting up your SharePoint knowledge resource and guidance on how to best use the built in tools, schedule a consultation today
