Sending Emails with Documents Attached through Power Apps

Do you need to send emails through Power Apps that require documents attached? if your data source is SharePoint, read on for the full solution..
Our thinking behind this solution is when building apps using Power Apps we are all very familiar with SharePoint as a data source, furthermore very comfortable with patching to SharePoint lists, then why not patch all the email requirements to a list and have Power Automate do the rest of the work.
Key Notes
- This solutions assumes that all your documents are contained in the one document library folder and not split across multiple different folders.
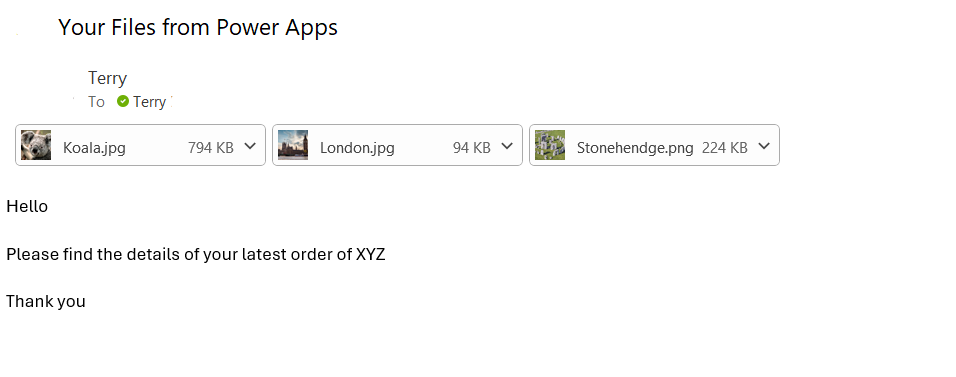
- Any document, file or image can be sent.
- If the Power Automate Flow has not run for 90 days it will automatically switch itself off.
- Try not to attach to many documents to one single email as outlook does have limits on email sizes which can range form 25MB to 150MB, and if the files collectively are over the limit the email will not be sent. This limit can vary depending on the email service provider and any specific configurations set by the organisation’s IT administrators.
We walk you through the full Power Automate flow and explain each action as we go.
Screenshots of full Power Automate flow
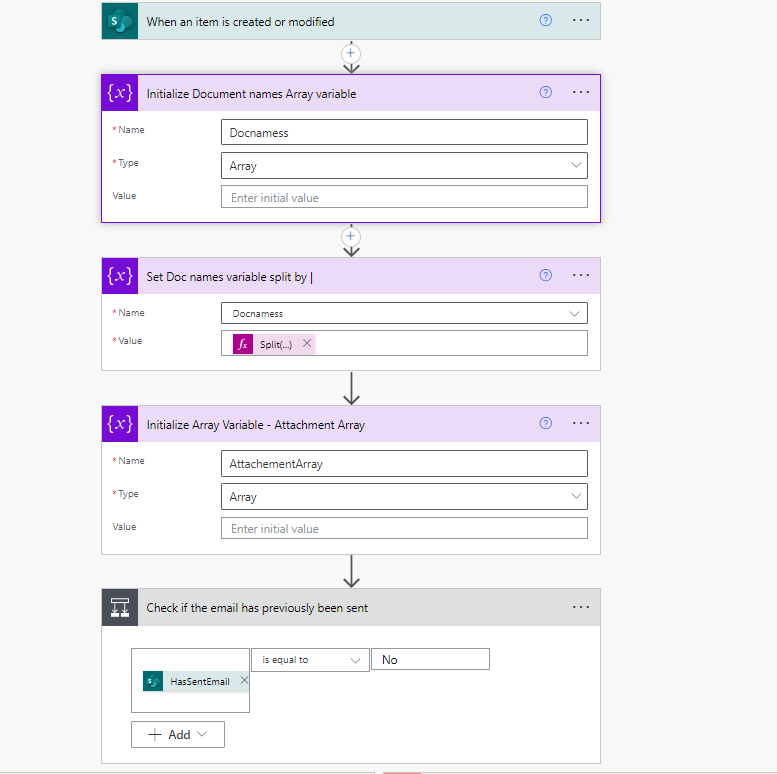
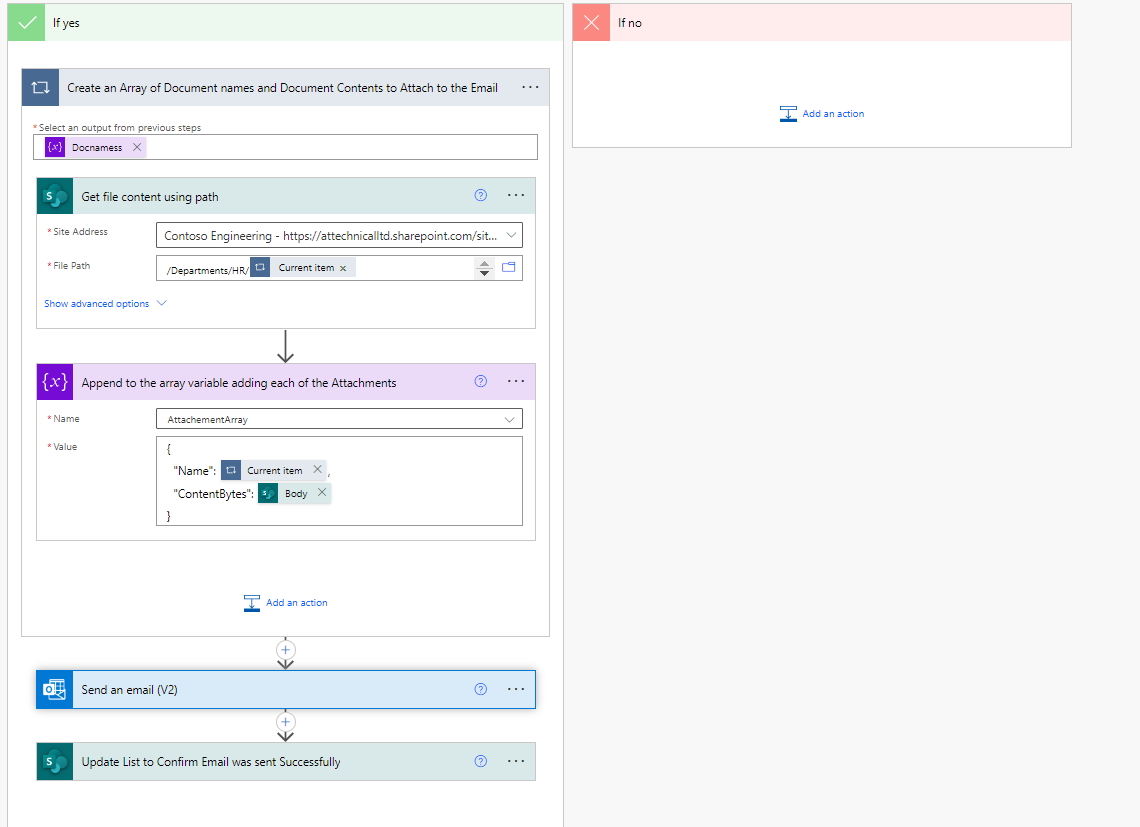
The list you set up should look similar to the below, key fields required Email Address, Email Subject, Email Body, Document Names, Email Sent


The Trigger action ‘When an item is created or modified’ is used in this example as we wanted more control over testing without creating lots of records or repeatedly submitting records through our app.
We could equally use the trigger ‘When an item is created‘ instead as this will only fire at that point when the item is created.
NOTE: in a live scenario using the ‘When an item is created‘ trigger will work better, because it takes away the risk of the email being sent more than once accidentally.
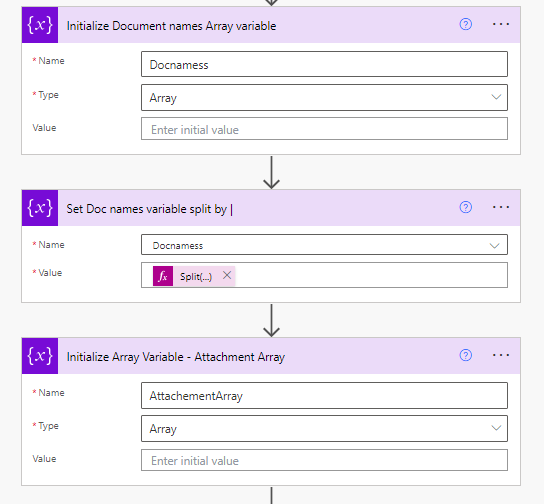
In the next few actions we are declaring variables, we use arrays to store the document names sent to the list from the App then we also want to store all of the Attachment names and contents to attach them all in one go at the send an email stage
Split(triggerOutputs()?[‘SharePoint List Field that contains the list of file names’],’|’)
When writing the document names from the Power App to the SharePoint list it is important to specify a separator so that when we receive all the document names they can be split and the content can be fetched accordingly. In this example we use the | delimited but you could use any separator.
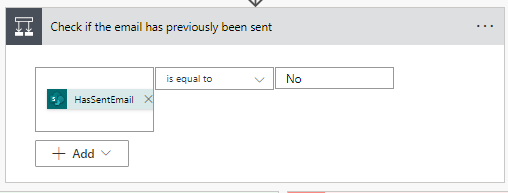
Check to see if the email has been sent before if it has do not send it again, this basic condition checks this, if you used the trigger mentioned earlier, to only trigger the flow when an item has been created you really would’nt need to make this check or flag if the email has been sent unless you wanted it for auditing purposes.
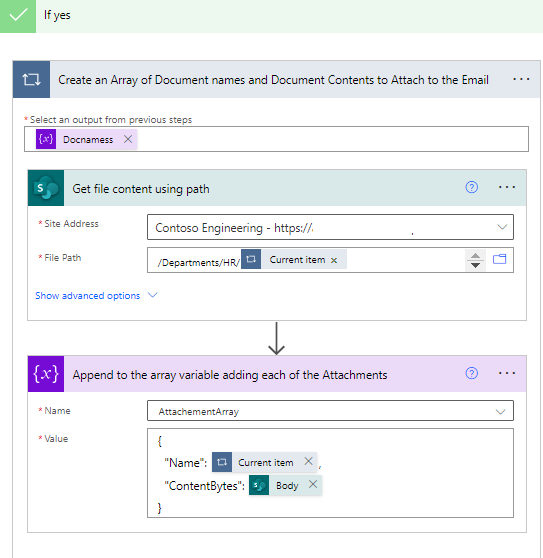
Next we do an ‘apply to each‘ to each on the array we split in the earlier step:
For each of the items in the array get the file content using the path, here what we are doing is we enter the SharePoint site name where the documents are located, then as we know that all the files sit in the same document library in the same folder we can target that in the file path as shown in the screen shot, then the last ‘/’ is the file name which is what we had stored in the variable split by ‘|’.
Use the Dynamic Content to add in the Current Item which holds the file path.
The Get file content using path’ action will get the record from SharePoint.
The next action adds all of the documents together into one array, using the ‘Append to array‘ action combining them so that they we can easily attach them all to the email, also using this method avoids use needing to know how many documents have been sent, because the split and apply to each will both run until they have recursed all of the records.
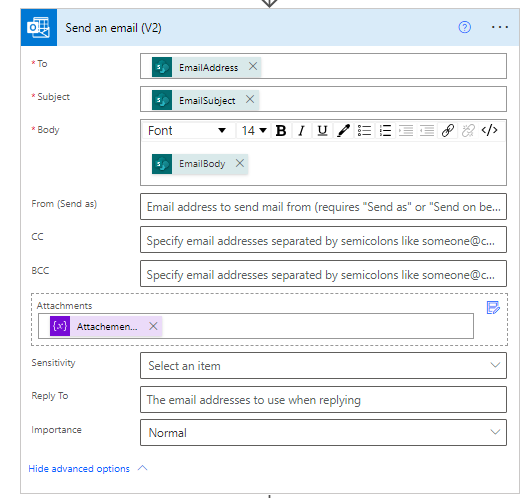
Use the ‘Send email v2′ action, use the dynamic content to enter the Email Address, Subject and email body from the SharePoint list.
At the bottom of this action window click the ‘show advanced options’ button, make sure to click the button highlighted blow, which will then show the attachments instead of the attachment.
Add the Attachments array in this box using the dynamic content,

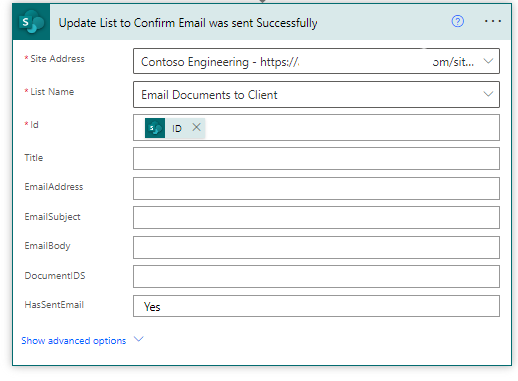
Finally use the ‘update item’ to update the list item that the email has sent by changing the has sent email field to Yes as shown.
Power Apps Configuration
Inside the gallery with all the documents, add a check box,
Go to the OnCheck Property and set as follows:
Collect(col4Email,ThisItem.’File name with extension’);
This will add the record to the collection when the option in the gallery is selected.
Next go to the on UnCheck Property and set that to:
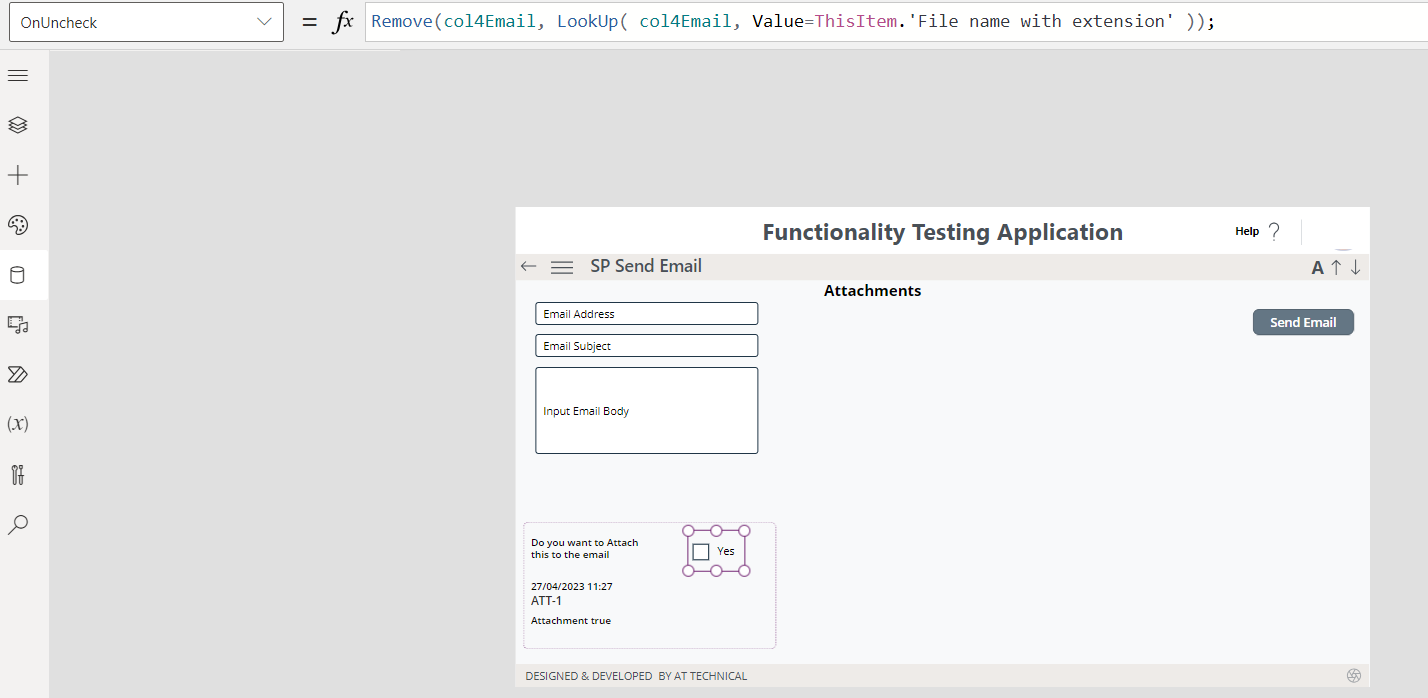
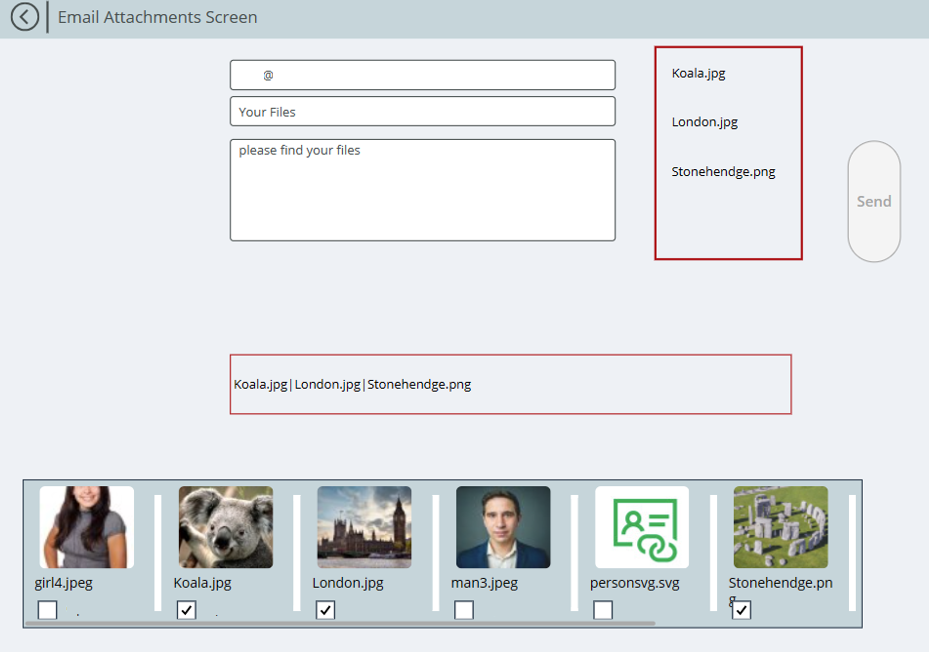
Put the collection into a new gallery col4Email, so that the user can see what they are attaching,
Add a label in the label enter the following to join all the document file names together:
Concat(col4Email,Value,”|”)
Next is to program the Send button to patch all the data to the SharePoint list so that it can be picked up by Power Automate and the email sent. To do this, enter the following code changing the List name to reflect the name of your list in SharePoint, in this example my SharePoint list is Email Documents to Client:
Update: Adding Documents directly to Email in Power Apps without using Power Automate
If you would like to send emails directly out of Power Apps, you can send files from your local computer using the attachment control, this solution wont work for document libraries unless you have them locally synced.
Add the Attachment control to your screen,
Then use code similar to the below for the onselect property for your send email button:
Office365Outlook.SendEmailV2
(
txtEmailTo.Text, txtSubject.Text,
txtBody.Text,
{ Attachments: ForAll( attAttachments.Attachments,
{ ContentBytes: Value,
Name: Name
} ) } );
Credit to Matthew Devany for this tip:
Conclusion
We hope you found this blog useful if you have any questions regarding the blog please reply to us on the post here: Linked In. If you need specialist support please get in touch through the Contact page.
If you want to learn more about SharePoint, and Power Platform discover more of our blogs
Need SharePoint Help?
Would you like training on SharePoint for your teams? or do you need help setting up your SharePoint knowledge resource and guidance on how to best use the built in tools, schedule a consultation today
