Build Your Own Employee Directory
SharePoint + Power Automate
Integrate Active Directory with SharePoint using Power Automate to create your very own Employee Directory

SharePoint Employee Directory from Scratch?
SharePoint List Configuration
SharePoint lists are dynamic and very adaptable, using this to host our directory is perfect especially when it can be directly embedded with ease into our SharePoint pages and is automatically indexed giving our users much easier ways to find people they need in the organisation.
Within the list we really need a few key pieces of information: Name, Email Address, Department, Job Title, Phone Number and Managers name, we could also get the photo if one was available but this will add much more time for the flow to run against a directory of over 1000 users.
Navigate to the SharePoint site where you want the employee directory to be, then select new and click the lists button, next select new blank list and add the columns as shown below, NOTE you can use the title column as first name just select the title column click the down arrow next to it and select rename

Thats the list created we can also create different views from the list by clicking the top right down arrow were it says All Items and selecting, create new view, this is important if you wanted a different view per department for example as you can use this to filter the data acorrding to your specific needs.
Power Automate Configuration
Power Automate is going to be doing all the work on this employee directory, it will be responsible for clearing the list, searching Office 365 users and determining whether or not the user should be shown in the directory, for example we would not like to show all service accounts such as sales, IT, Accounts etc in our employee directory.
First off go to Power Automate (https://unitedkingdom.flow.microsoft.com/)
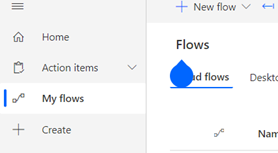
Click My flows then ‘+ New flow’
Click the ‘Scheduled Cloud flow’ option, give your new flow a name
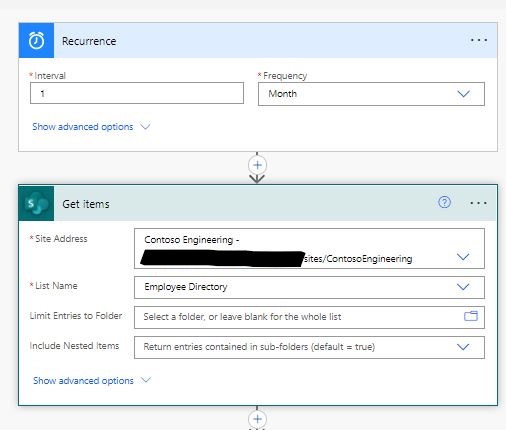
you can specify how frequently you would like it to run we would recommend setting this value to monthly if not bi-monthly.
Create the flow
The first action we want in our flow is to check our SharePoint list and Get all the items
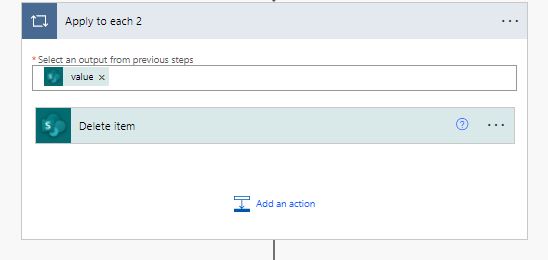
Next we want to remove all the employees(Items), from the list so we have a blank list, we could alternatively cross check each and see if it has changed and update those but it’s a bit simpler to start with a clear list another reason not to run this flow on a daily or weekly schedule.
Click the + icon below the Recurrence and search for SharePoint, then click the SharePoint Get Items action form the SharePoint Connector
Select the site where you created the employee list, and click the down arrow and select the list.
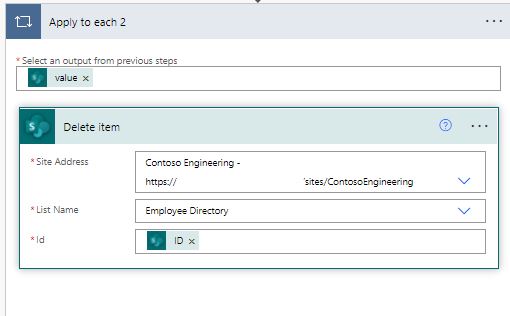
Next click the + again and search for SharePoint or Delete Item and select the sharepoint delete item action
Again add in your sharepoint site URL from the drop down and select your list in the ID column click here and it will bring up the dynamic content tab to the right and select ID you will see when you select this it will automatically wrap the action in an apply to each loop meaning that for each of the items retrieved with the above action of get items it will run the delete item against this.
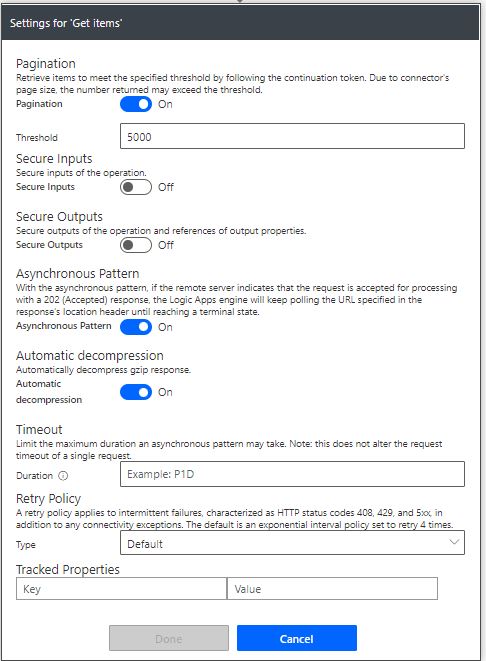
NOTE – if you have a lot of users it is handy to know that the get items is restricted to how many items it will retrieve to change this select the three dots to the right of the get items action and select settings, in this view set the pagination to over how many users you have, in our example this is set to 4000 as we have less than 4000 users
‘Click ‘+’ under the apply to each so that the next action sits outside of the apply to each which deleted the sharepoint items
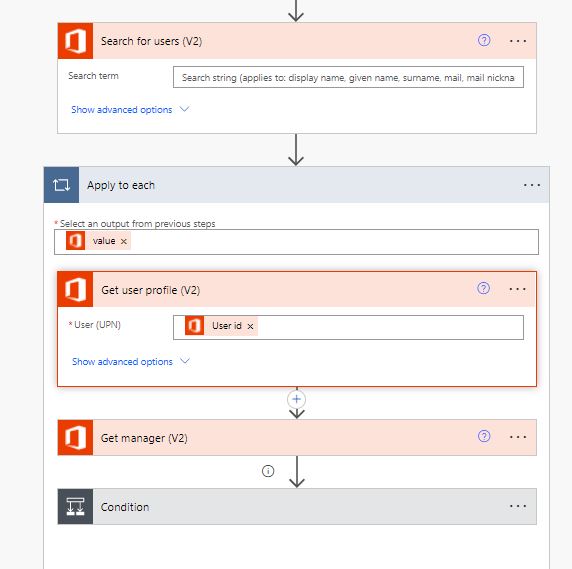
Search ‘Search for users’ and select the office 365 users connector as shown, leave the search term blank as we want to get all results back
Next action we need is the get user profile, click the + and find this action in the list
In the User(UPN) field click inside and it will bring up the dynamic content view, add in the user id as shown, you will notice when you add in the user id the action is wrapped in an apply to each loop,
Do the same with the Get manager action adding in the user id from the dynamic content, ensuring the get manager sits in the same loop as shown
Add a new condition below the get manager action, in the condition value field select the mail of the manager as they dynamic content you may need to scroll down to see the get manager dynamic content and then select mail. The condition should be set to is not equal to, then set the last part to null to do this click in the box and next to dynamic content it says expression click this and type in the box null then ok and you should see the null with an fx next to it as shown
The next steps are to establish if the user account is enabled and if the user has a manager but in this flow we are not too concerned if they do not have a manager we will still add them into the list, but the flow will fail if the get manager returns a null value so to get around this we configure run after properties on the first condition, to do this click the three dots on the newly created condition and select the configure run after option and tick the box which says get manager failed
if the managers email is null that’s ok we can just set it within the list to say manager not provided, but if the department is blank or the account is disabled we don’t want these to be sent to the list so we need to filter this out
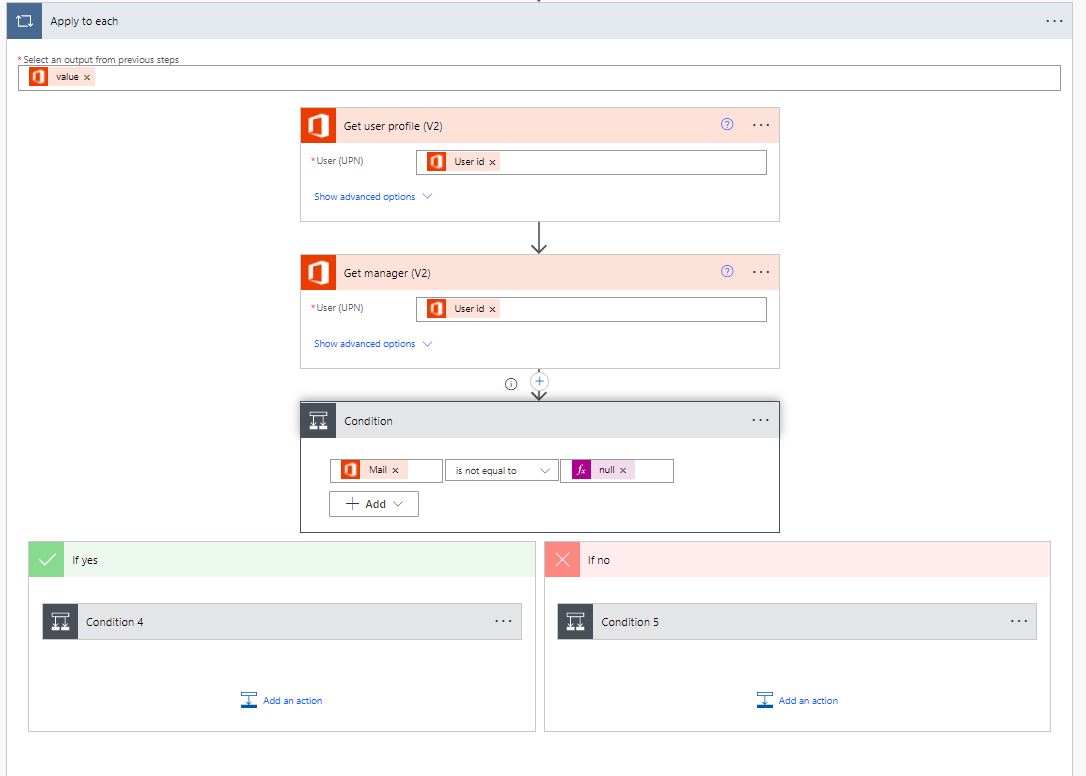
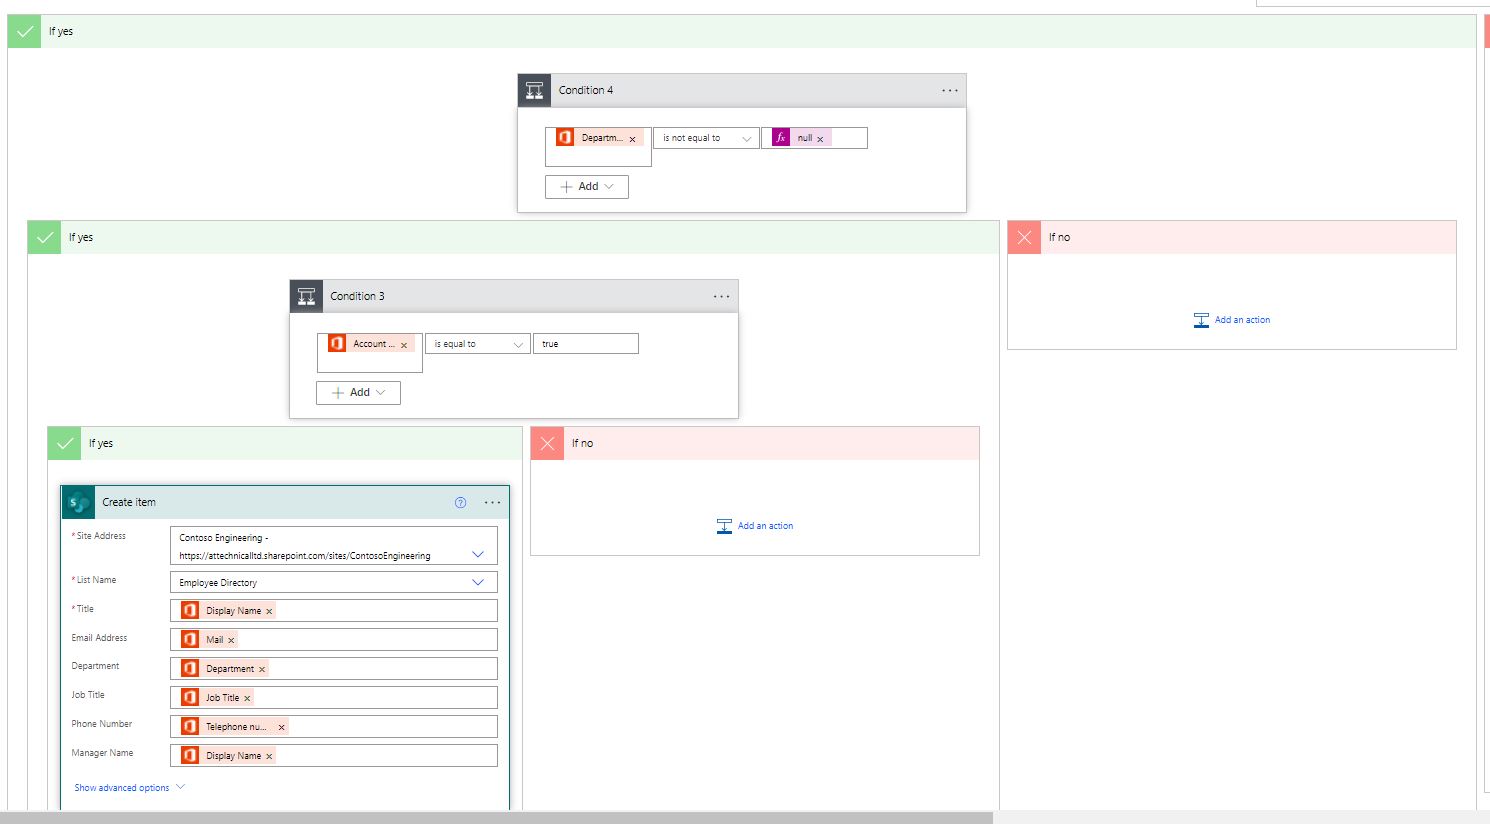
If the user does have a manager we pass it through two more condition one to check if the user object has a department assigned and the other to check if the account is enabled in the instance that both of these conditions evaluate to true then we will write the information to our employee directory list if either of these are false we will not right the information to the list.
If the user does not have a manager we still want to check if they have a department and if the account is enabled the only difference is when we write this to the list we cant pull the manager so instead we put some free text in to say the manager was not provided
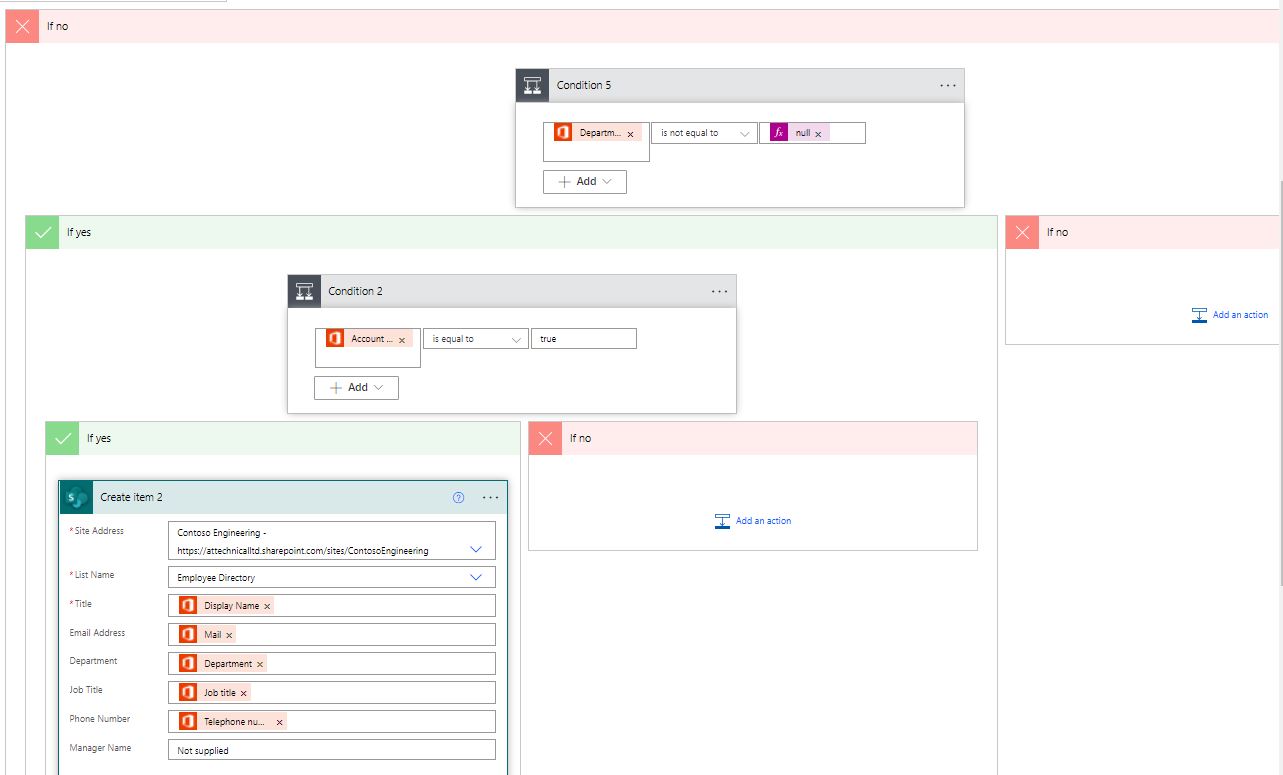
Once the conditions are added it is time to test your flow, click save and then click the test button located to the far right hand corner of the screen, you should see it running through the actions then if you go to your SharePoint list you will see users begin to appear
Conclusion
This flow demonstrates how to create a directory of all active employees without needing a paid add on or needing to add external apps to your SharePoint site. The flow does not use any premium connectors so can be configured with a standard Office 365 Business license. Once the flow is running it’s good to go what you may notice is that some employees may not have departments or job titles assigned, this may require a bit of housekeeping to get the information accurate but once complete you have your very own up to date employee directory. You can also create a new view and select the gallery view which displays the content in tiles to give a different feel rather than the list look, you can also go one step further and add some conditional formatting to the list to show different departments in different colors or can use filtering options to filter out certain departments from view.
Need SharePoint Help?
Would you like training on SharePoint for your teams? or do you need help setting up your SharePoint knowledge resource and guidance on how to best use the built in tools, schedule a consultation today
