Microsoft Forms the Definitive Guide to digitising forms

Introduction to Microsoft Forms
Forms as part of the Office 365 standard and business license, Microsoft Forms is a value adding application, very similar to Google Forms or Zoho Forms, it offers the ability to collect and analyse information which is stored online. Microsoft Forms has the added benefit of integrating seamlessly across the Office 365 suite of applications.
Businesses with a lot of paper-based forms can harness this tool to digitise some of those operations.
Forms can be shared internally with members of the organisations Office 365 tenant or can be publicly (externally), when shared internally you can automatically collect names and email addresses of the user submitting the form if its externally shared unfortunately you would have to create a name and email text field to collect this information.
First off you will want to login to https://forms.office.com/ note in larger organisations the license may not be assigned on your user account which will result in an access-based error – in this instance contact your responsible IT personnel and ask for the license to be added, this shouldn’t be a problem or incur any additional cost.
To start with we want give the form a title, add our key sections then create the data entry fields.
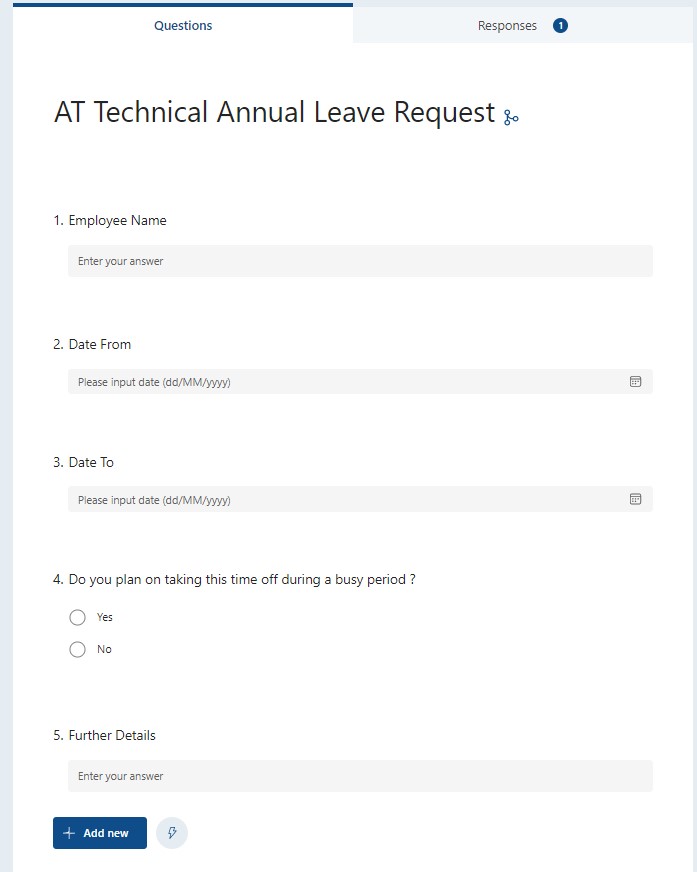
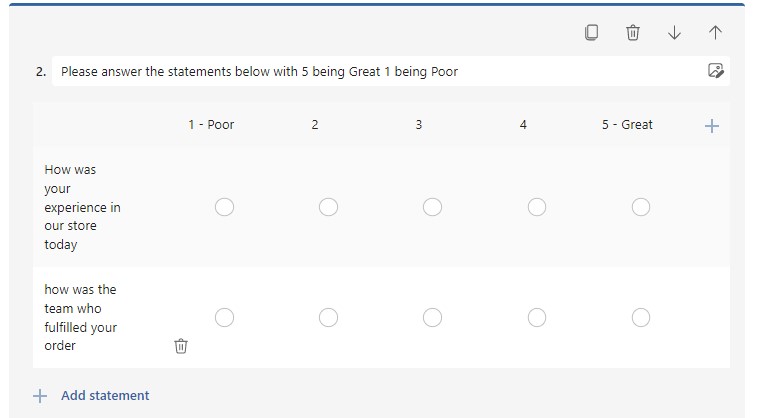
You have a few options for question types, Multiple Select, Checkboxes, Date formatted questions, Text (including numerical), File Upload, Ranking (ordering pre-selected answers), Rating, Net Promoter Score and Likert. (See Example of Likert Question Below)
Note – when using the file upload option within Microsoft forms, the form will create a folder on your OneDrive under a folder called Apps>Microsoft Forms>” form name”.
Test then test your form again using the preview button at the top right of the screen to ensure its working as you would like, its also worth getting a few extra opinions before sharing to a wider audience.
Branching Microsoft Forms
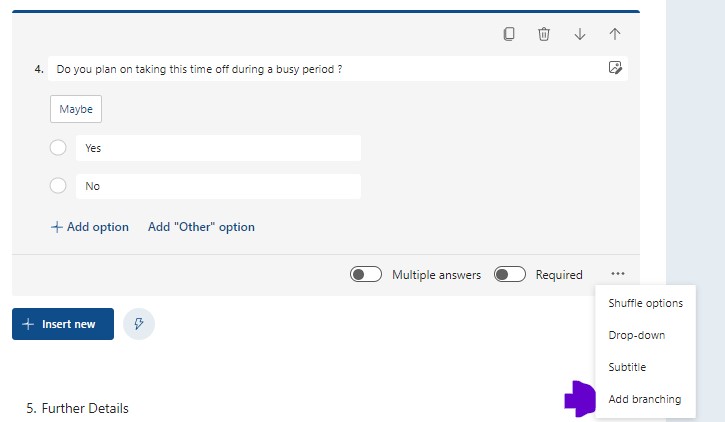
To improve overall usability of the form it is best to ask a questions with set options then depending upon the answer either ask another question or proceed to another question or section of the form, to do this we need to use ‘Branching’ the first part to branching is asking a question where you know only one answer can be selected, (Note – a multiple answer question will not work with branching).
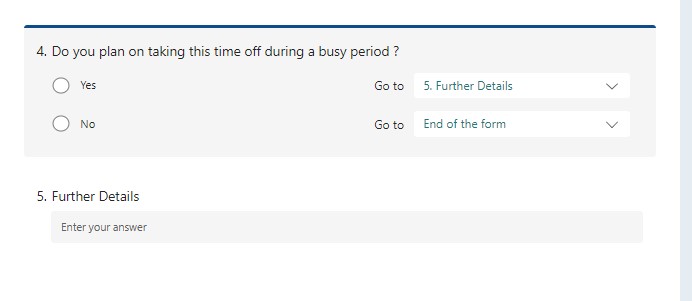
Click the Add branching option then select the next options as shown below in the drop down, you can either go to another field you have created such as further details or end the form, you could in this instance ask another question such as has this been internally approved and then add branching to that question.
Microsoft Forms Sections
Creating sections to segregate the questions within the form is good practice for many reasons, such as:
- Creates a divide between different sets of questions
- Makes branching the form much easier if whole sections of questions need to be skipped based on the user input
- Much cleaner user interface, not to overload the user with too many questions
- Can duplicate whole sections, therefore not needing to duplicate individual questions
- Branching can be added to the bottom of the sections so for example if a question sends the user to one of two sections, then at the bottom of each it could then lead them to an entirely different set of questions
- Each section can have its own description (Subtitle) informing the user of what this section is for
- Each section can have an image uploaded to sit alongside it
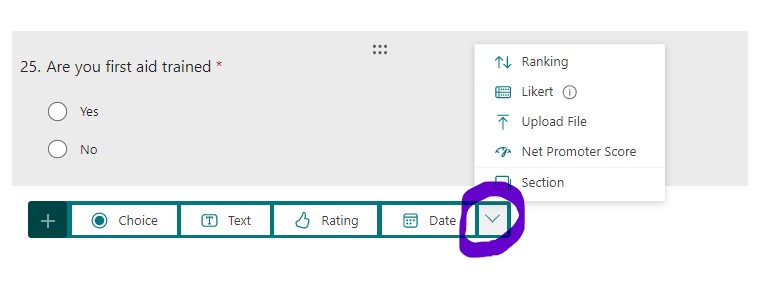
Adding a section to the form, click the add new button then select the down arrow and then select ‘Section’, this creates the new section give it a name at the top and a description if needed otherwise leave the subtitle field blank.
Styling Microsoft Forms
When thinking of how you want your form to look, there are a couple options in terms of colours, background, and logo.
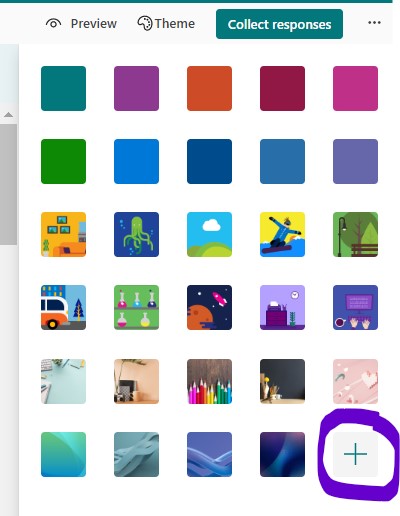
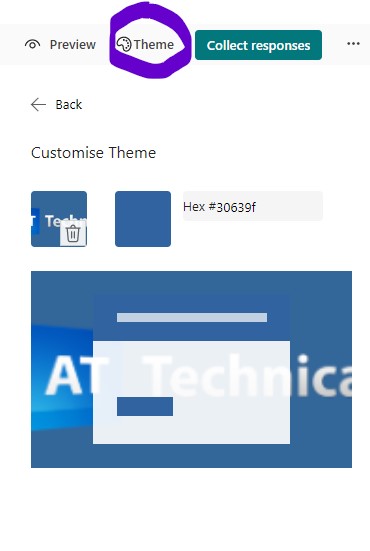
To set a background and colour set for the Form select the ‘Theme’ button located at the top right then either choose on of the pre-built templates or opt to create your own. Select the + button to begin creating your own theme.
To create your own theme, you want a large image to use as a background image and then a hexadecimal colour code value, it may take a few attempts to get the background image as you would like it’s worth starting with a large image and then shrinking as desired.
To change the form logo, click the top title tag then select the image icon to the right and upload your logo or image
Note – if you are using the form as an embedded form in SharePoint or other website the background style does not show.

TOP TIP:
For consistency using Microsoft Forms begin with theming your form in terms of colours and custom theme and logo, then use this as a template for all future forms, if many teams within your organisation create forms share with them the link to duplicate the template form.
More Settings for Microsoft Forms
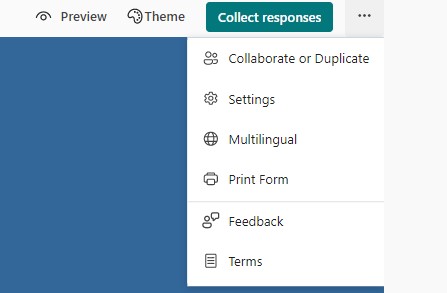
Adding other languages to the form: click the 3 dots to the top right and select the multilingual option then add new and then select the desired language, once selected the correct language click the edit button the left of the language name and then go through each question and add the translation for each, now when a user goes to your form they will see an option at the top right of the form to select desired language.
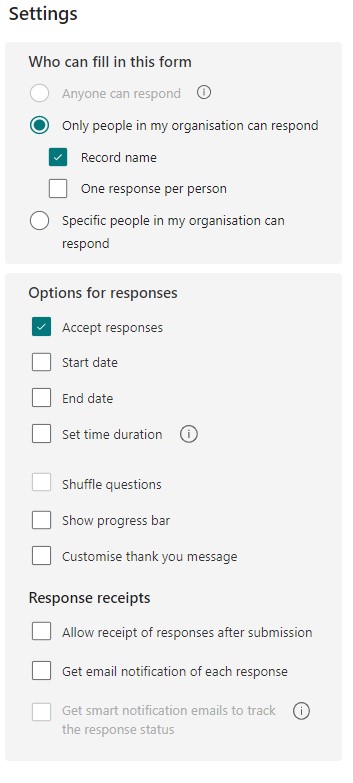
From the settings menu you can specify start and end dates to your form, check to display a progress bar to show the users how far they are from completing the form, set a time limit to complete the form this may be extra useful if you are using forms to create a quiz likewise the shuffle questions option is useful if the form is used as a quiz.
The form also can specify who can submit the form, note if you have a file upload question within the form then the form cannot be shared with external parties, only forms without file upload options can be shared externally.
Review and analyse form responses using the responses tab when editing the form from here you can download a spreadsheet of all form responses.
Under the collect responses button here you can specify groups or individual users who can submit the form and get the link or qr code to share your form with the desired audience.
Create a custom message to appear once the user submits the form (something like we will get back to you soon for emergencies contact {enter user email here}).
Generate an email to the person who create the form for everytime the form is submitted using the settings of the Form.
TOP TIP:
When creating forms as part of a team it is a good idea to create the form as a group form, to do this either create a new Team in Microsoft teams and use this group or use an existing group.
Click the groups section at the bottom of the Forms main screen (before creating a Form), then select the ‘New Group Form’ option next build the form, this way the form isnt linked direct to your Office account, it is linked to the team so they can all see the form responses and edit the form.
Another benefit of building forms this was is if your account gets deleted or disabled the Form and associated responses are not deleted after the 30 day retention period.
More Resources
Read More about custom SharePoint list How to use SharePoint Lists
Example of how to automate the output of Form responses: Working with Forms and Power Automate
Login to Microsoft Forms: MS Forms Link
Microsoft Forms own useful resources found Here
Conclusion
Microsoft Forms are extremely useful and given the data is stored on your own Microsoft 365 tenancy the data is secured start to finish, also as this is currently an active product line from Microsoft new features and functions are continually added, we hope to see the addition of a user lookup question in the future to help with validation elements when automating the Forms, currently if the form is only shared internally the form response information will collect the details from the user who submitted the form but their is no ability to do a lookup based on a user question.
Use Microsoft Forms for your surveys, quizzes, polls or feedback forms to collate data and use Power Automate to automatically notify or based on user inputs start approval requests, add branching logic to improve usability of the Form, give it a go and reap the benefits of a more digital approach to collecting and interpreting data.
Need SharePoint Help?
Would you like training on SharePoint for your teams? or do you need help setting up your SharePoint knowledge resource and guidance on how to best use the built in tools, schedule a consultation today
